A Wait & Return job takes you from the collection point (A) to a second address (B), then back to A. At the B address you usually wait while something happens — a document is signed, goods are swapped — before returning to the original collection point.
This guide walks you through each step in the app, from finding the job to marking it complete.
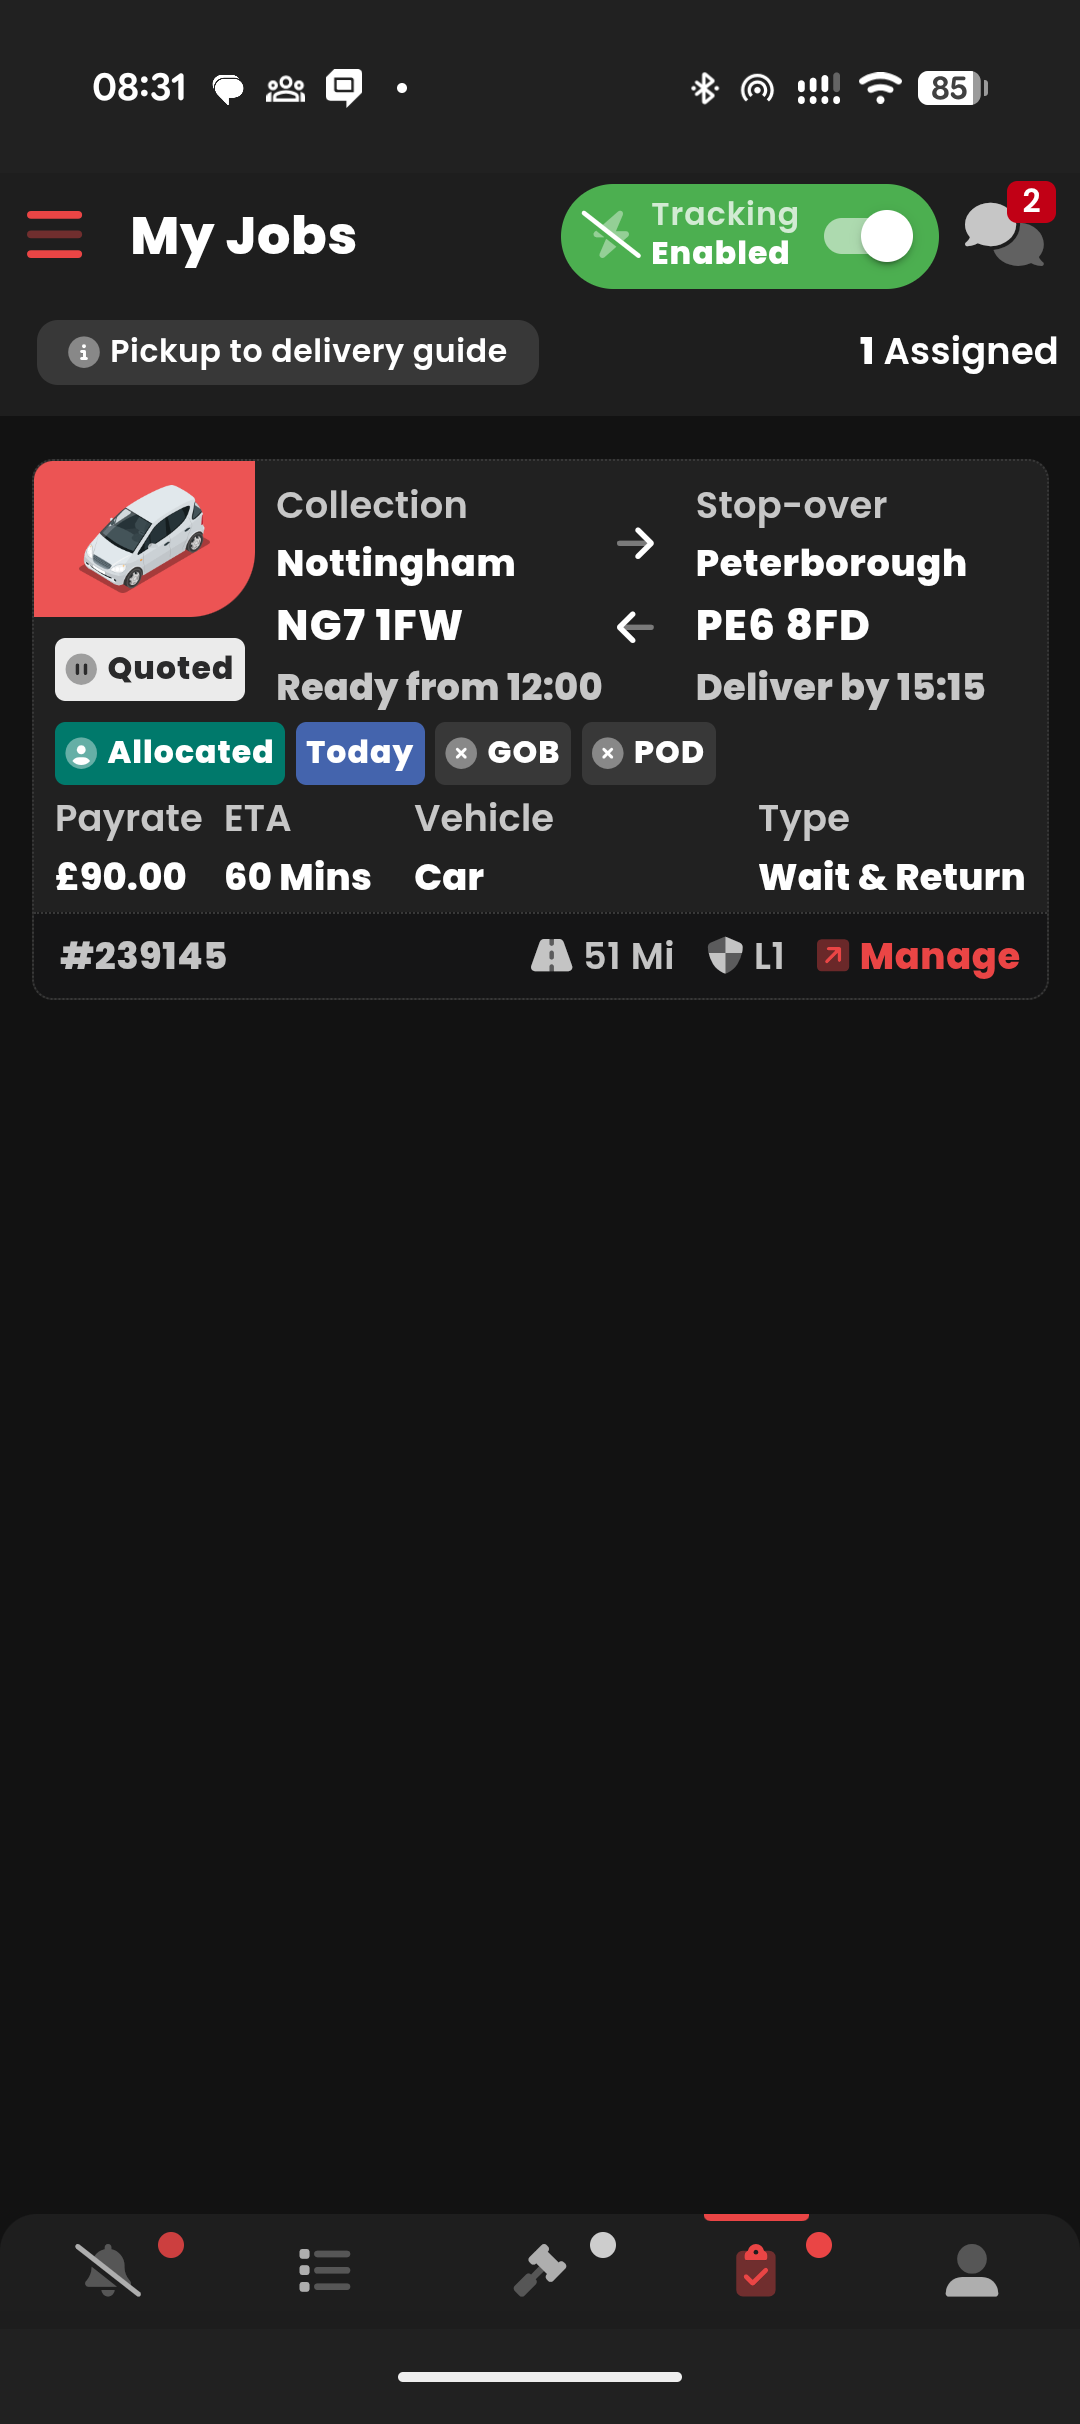
1. Spot the job in My Jobs
Open My Jobs to see your allocated work.
You can tell a job is Wait & Return in two ways:
- The Type in the bottom right of the job card shows Wait & Return.
- Between the two addresses there are two arrows pointing in opposite directions, showing you must return to the original collection point.
Note the second address is labelled Stop-over rather than Delivery — the job is not complete when you arrive there.
Tap anywhere to open the job.
2. Understand the Job Status steps
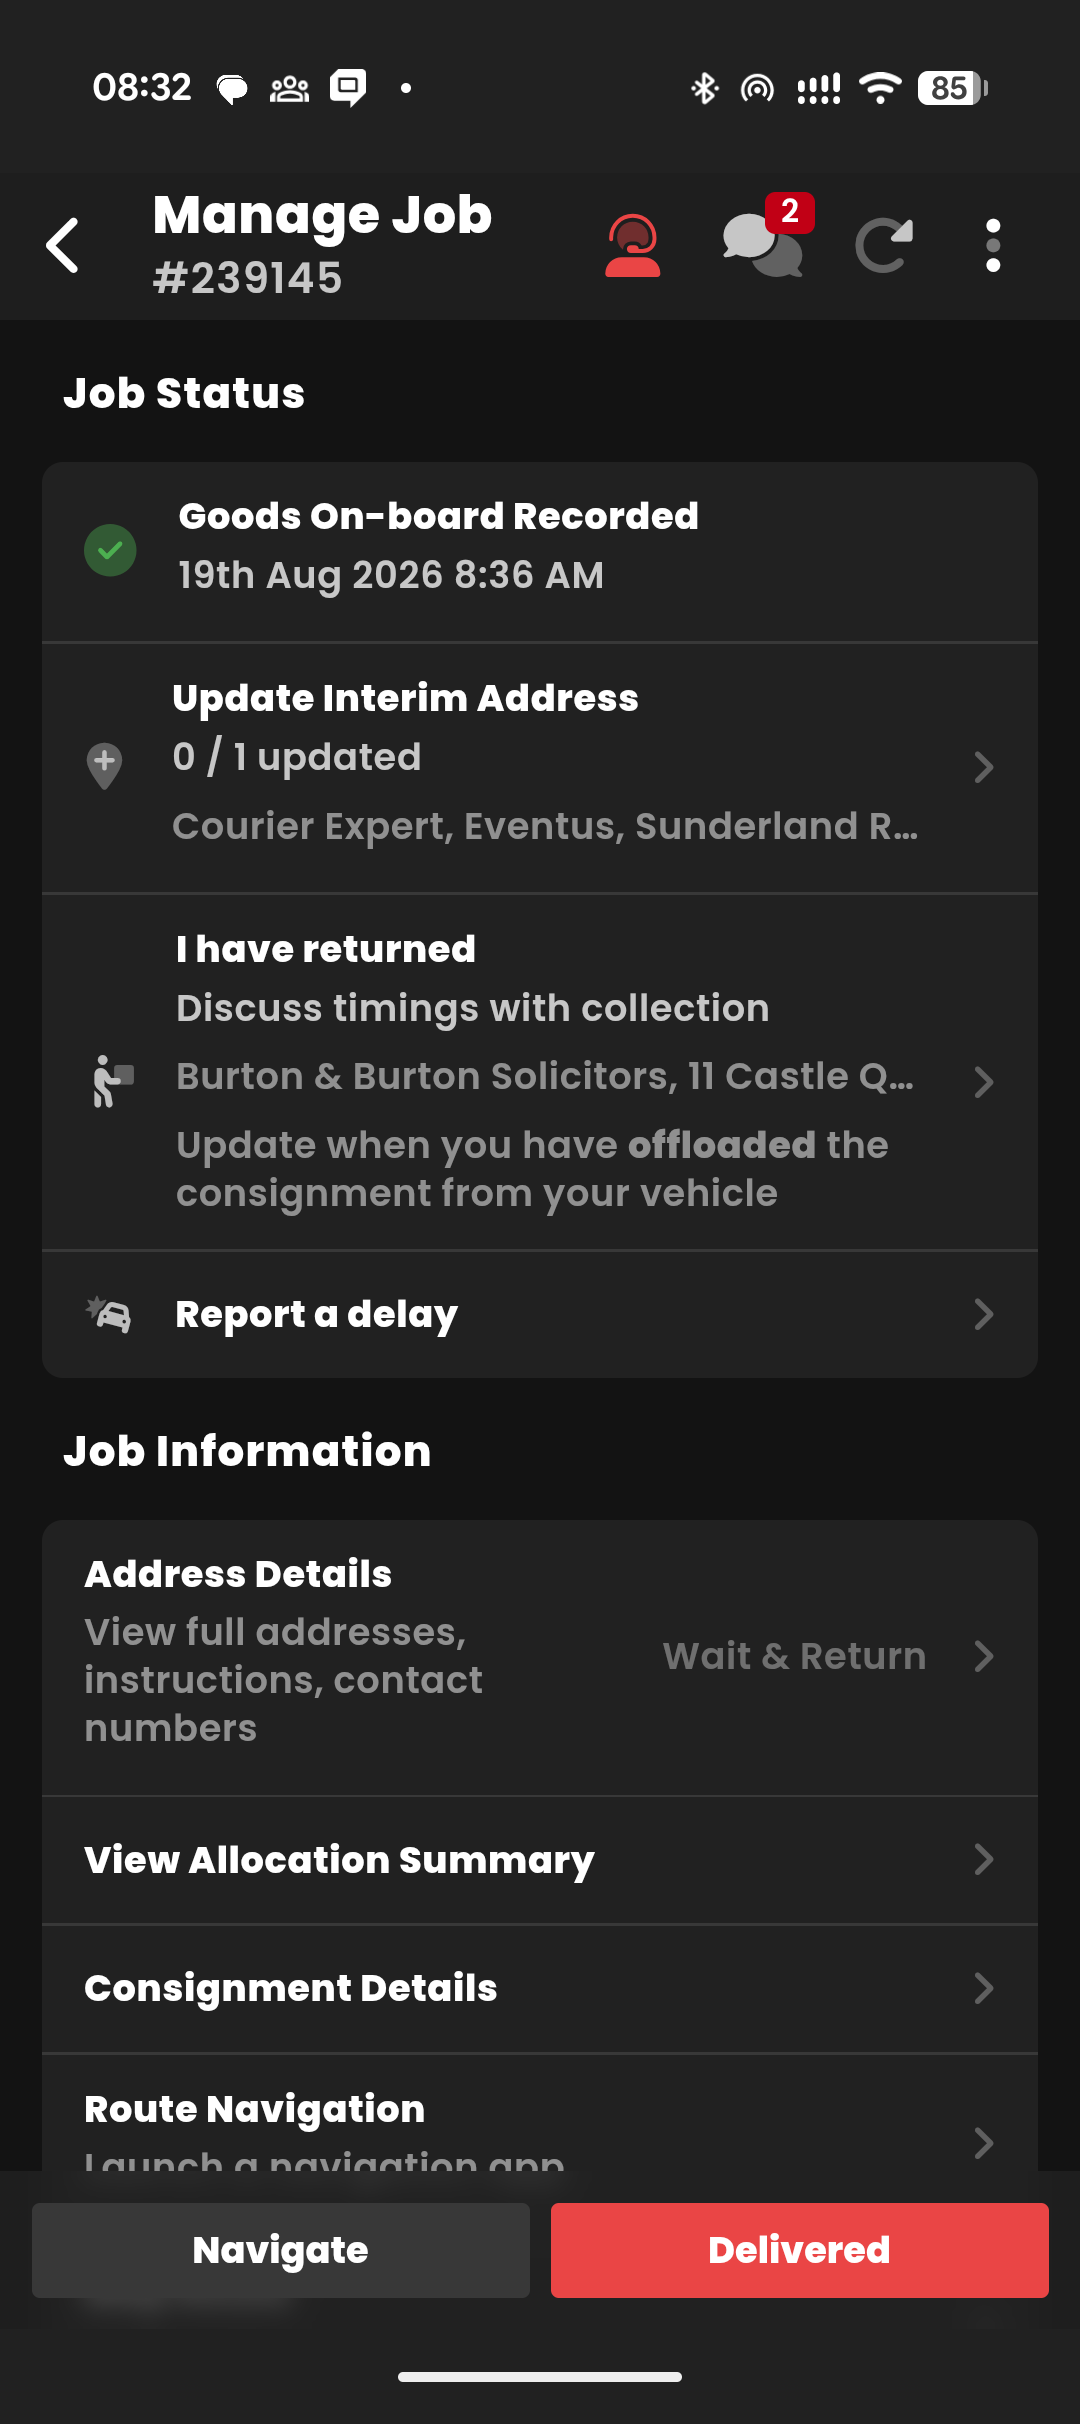
The Manage Job screen shows the steps for the job under Job Status.
A normal A to B job has two steps: I have collected and I have delivered. A Wait & Return has three:
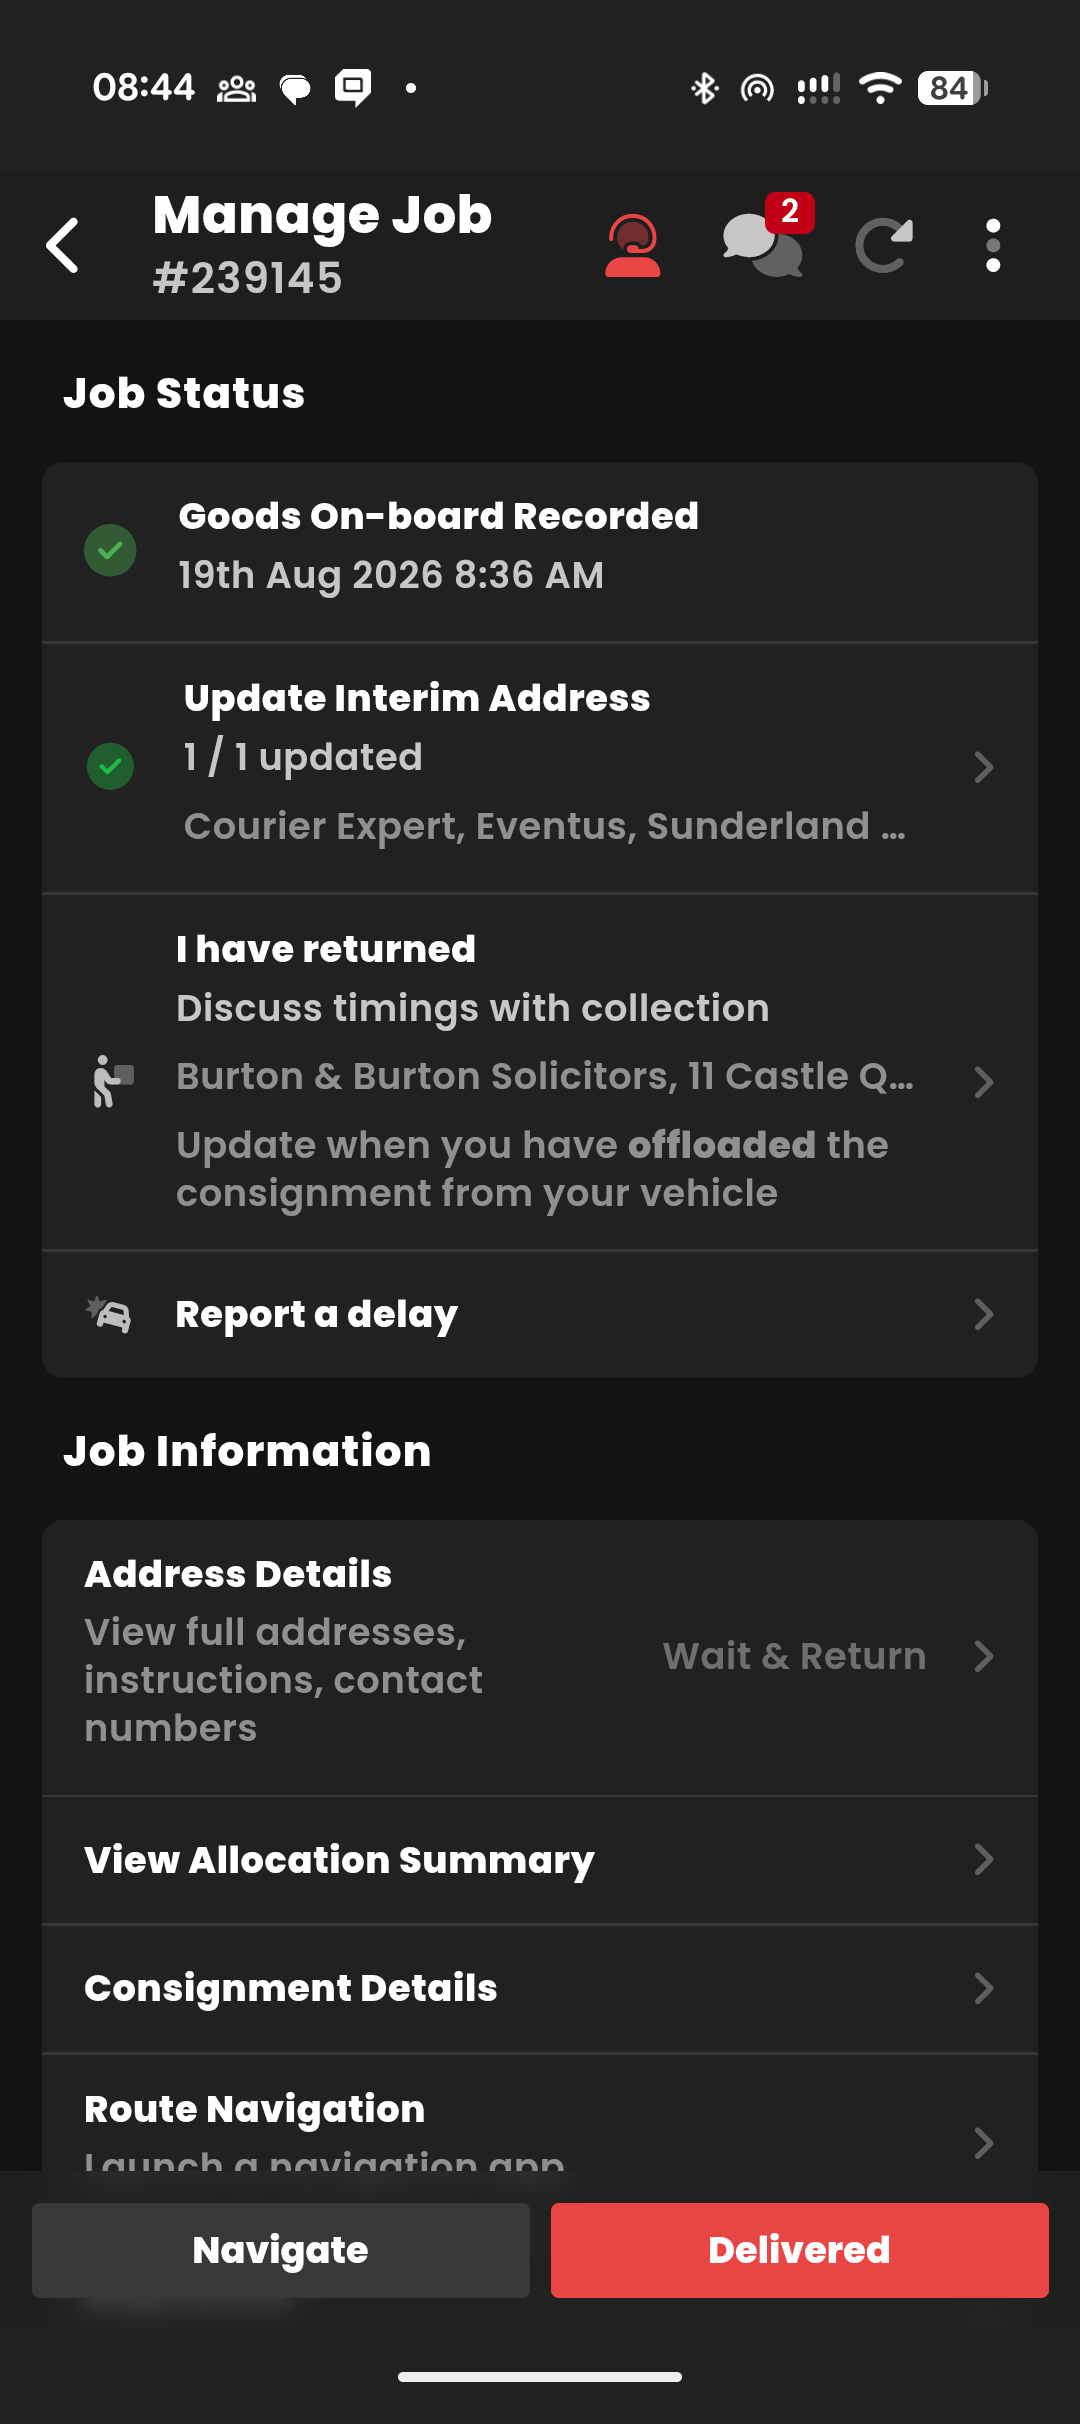
- I have collected — record Goods On Board (GOB) at the collection point, the same as any other job. In the screenshot this is already done, shown as Goods On-board Recorded with a green tick.
- Update Interim Address (0/1 updated) — this is the B address, your stop-over. Update this step when you arrive there and complete what is required.
- I have returned — complete this final step when you are back at the original collection point and have offloaded.
Important — agree a return time at collection. The step says Discuss timings with collection. Customers rarely set a deadline for the return leg, and the wait at the B address can make exact timings hard to predict. Agree a rough return time with the customer while you are at the collection point, and keep them updated if the wait changes it.
3. Complete the interim (B address) stop
What happens at the B address varies by job — it might be a document that needs signing and witnessing, or a swap such as a pallet exchange. Always check the special instructions on the job.
When you arrive and have completed what is required, tap Update Interim Address.
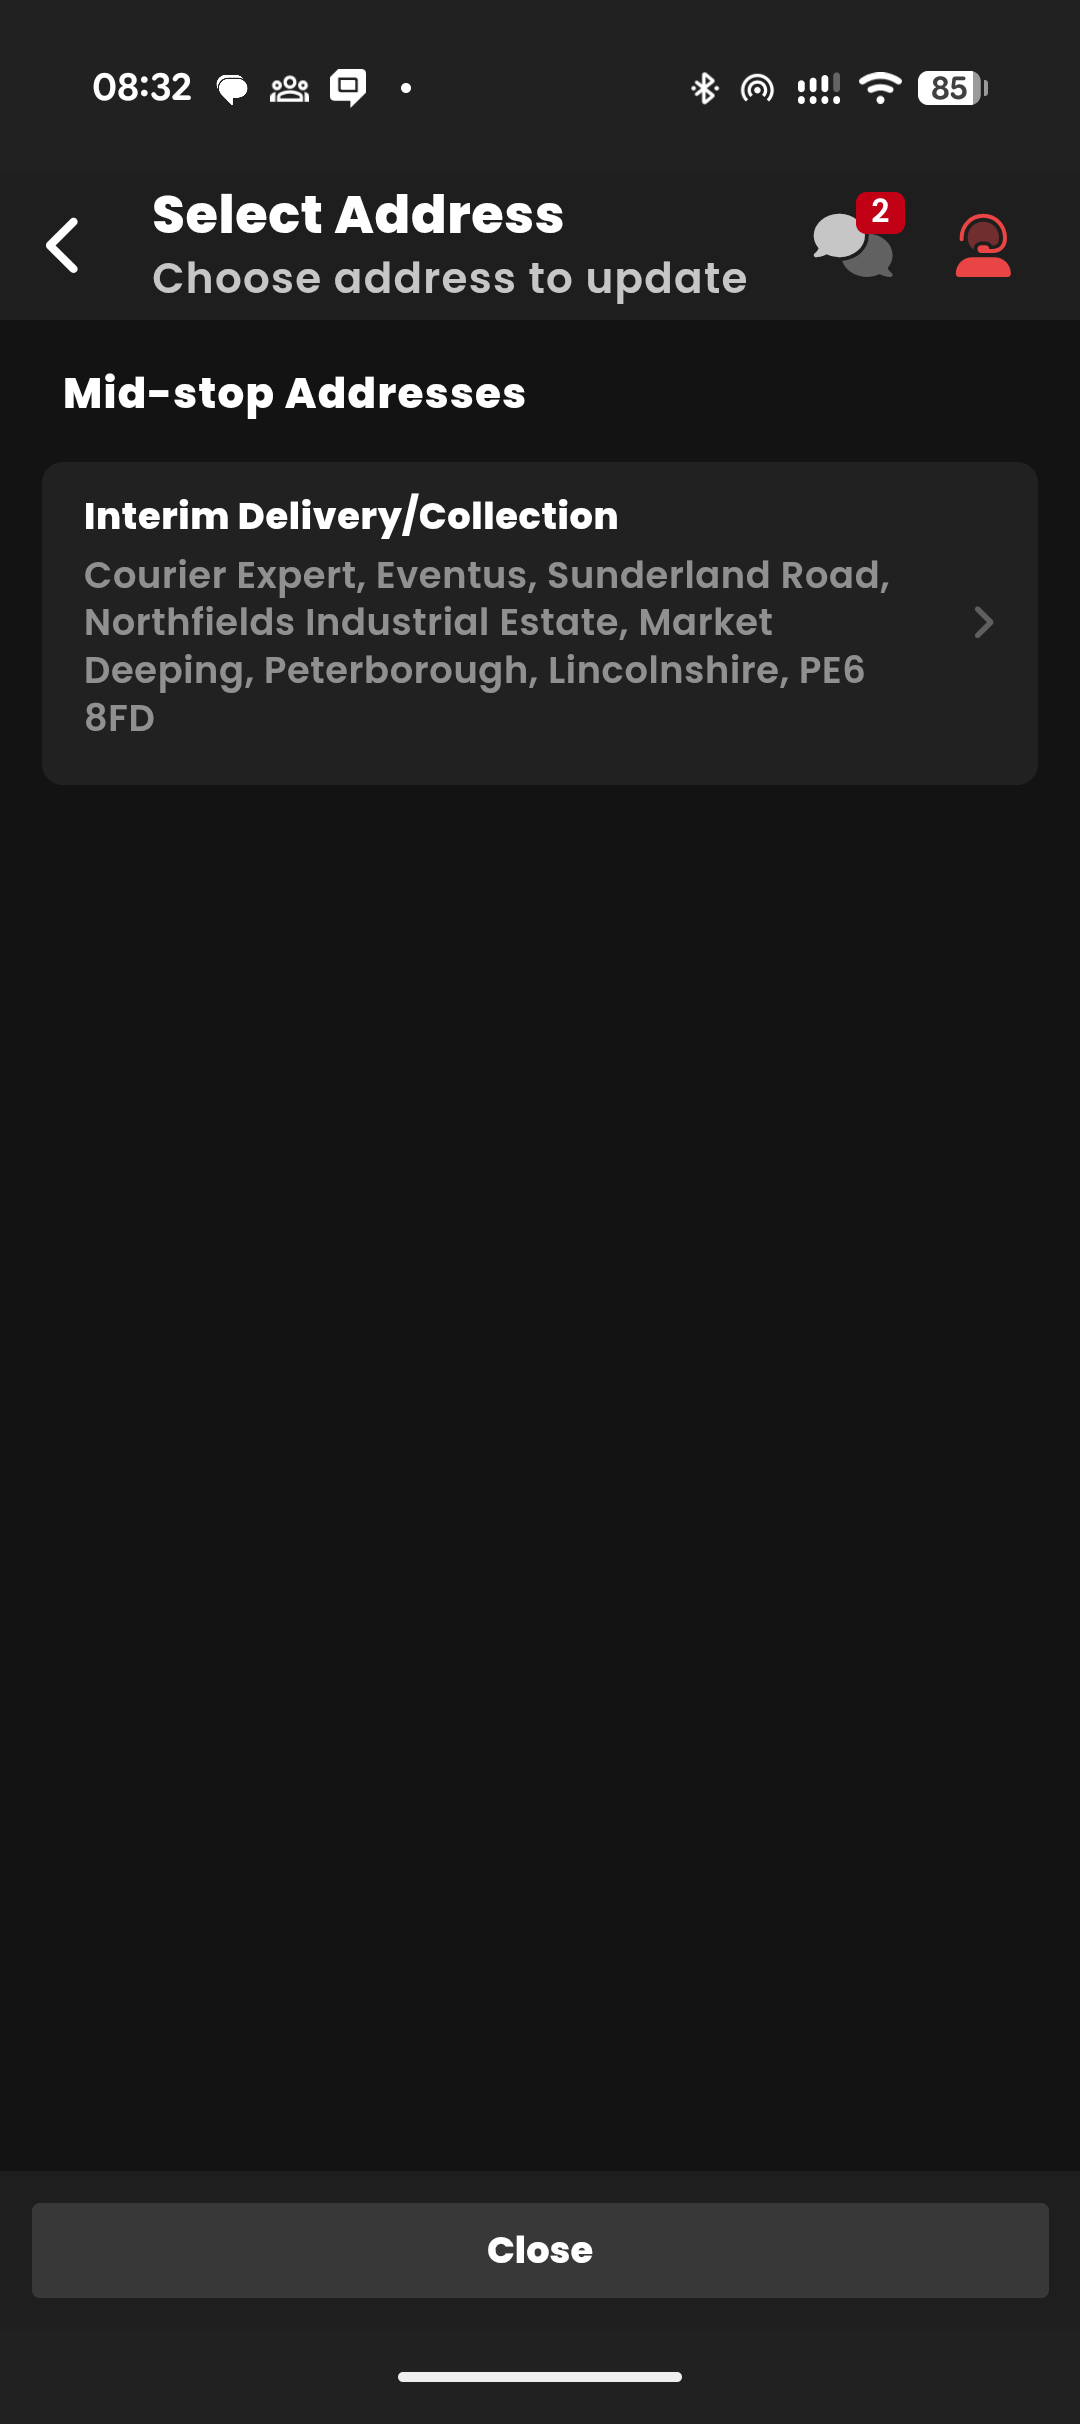
Tap the address to open the update form.
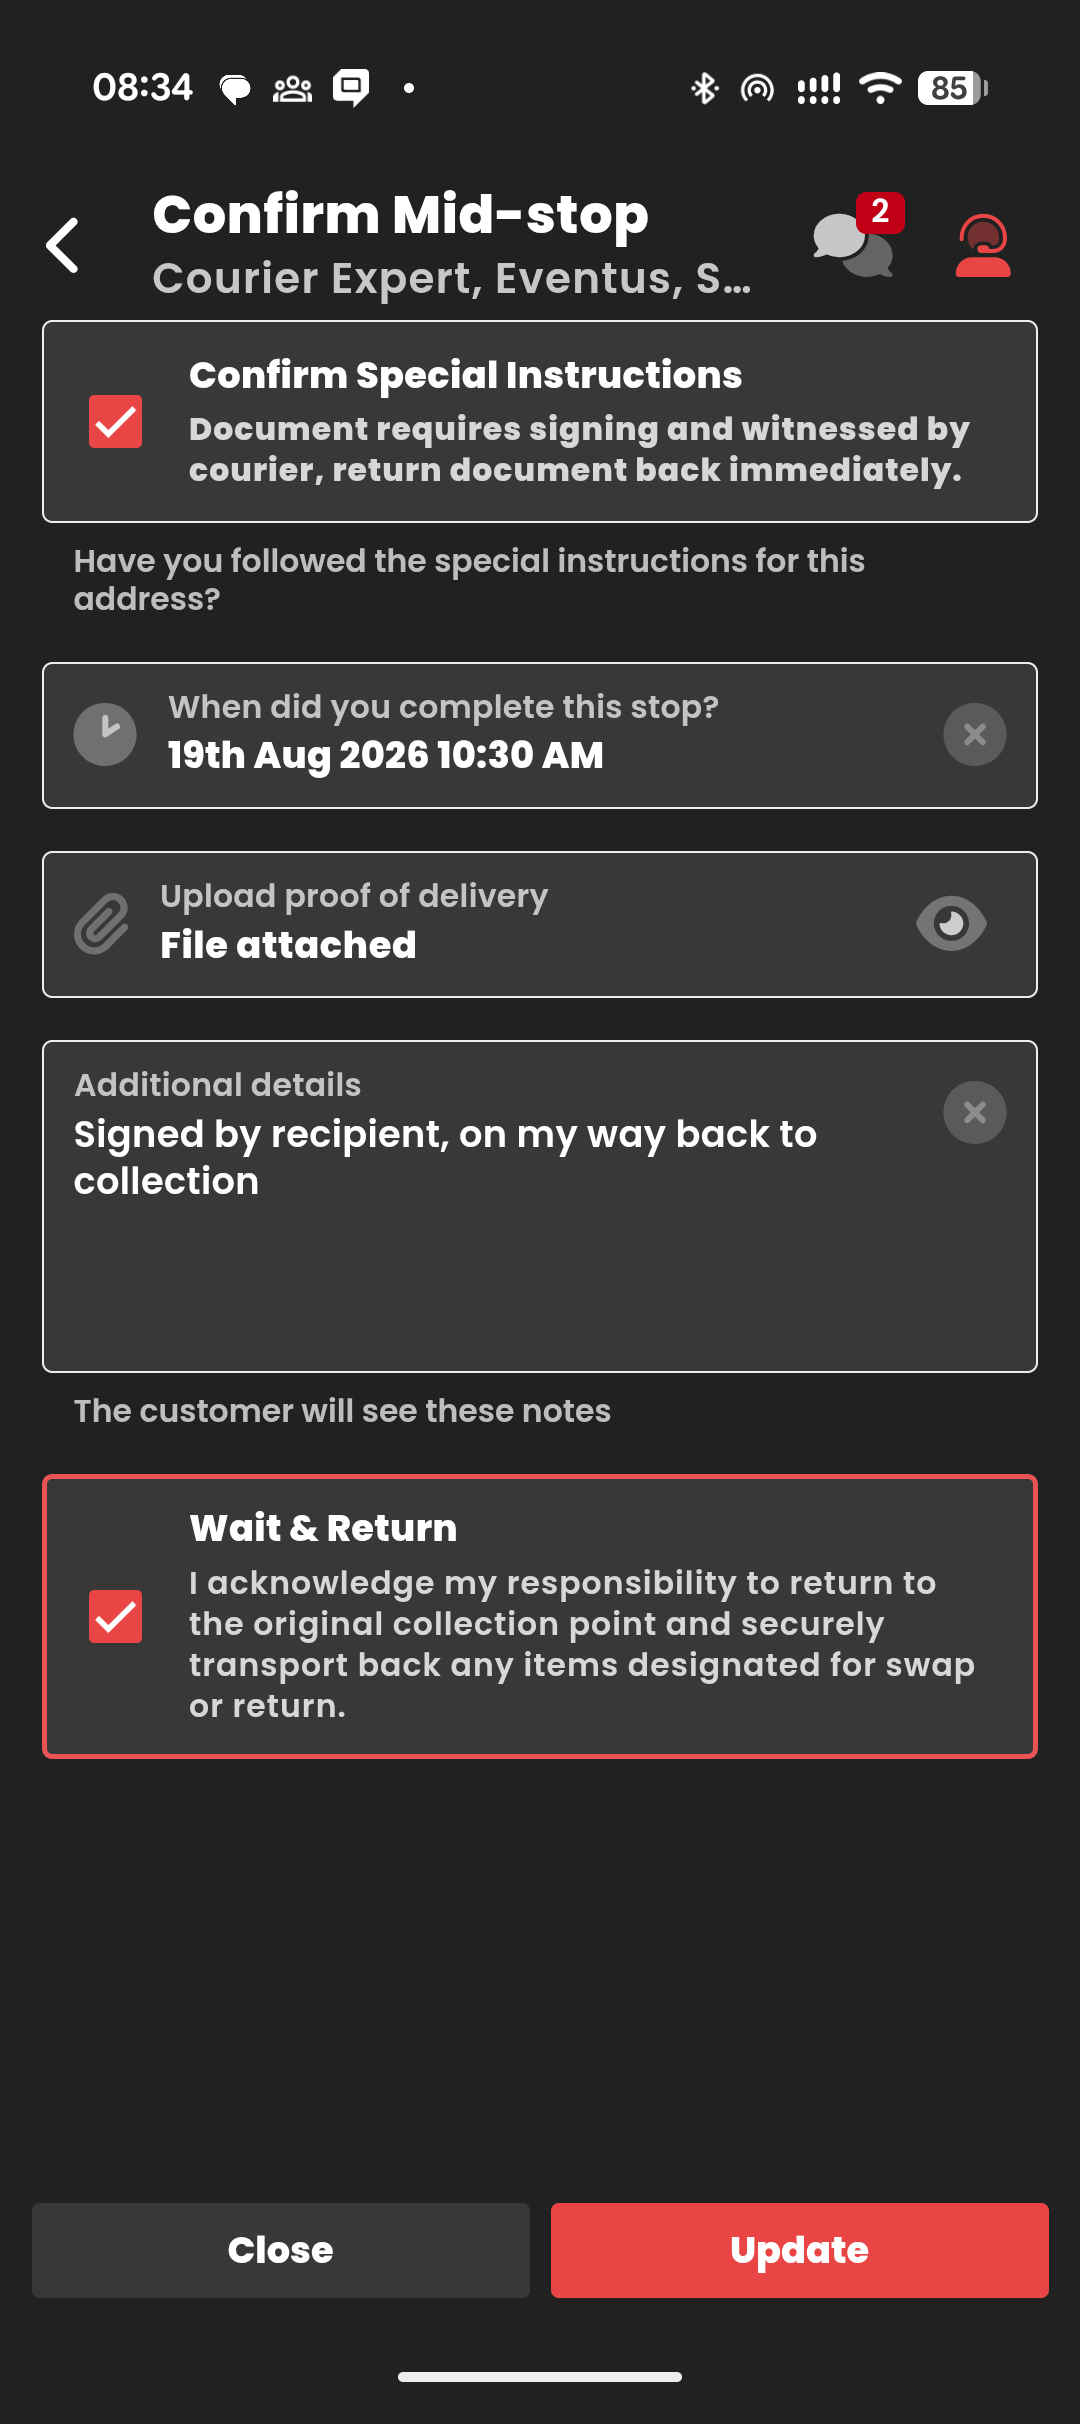
Complete the Confirm Mid-stop form:
- Confirm Special Instructions — tick to confirm you have followed the special instructions for this address (in this example, a document signed by the recipient and witnessed by you).
- When did you complete this mid-stop? — enter the time you completed the stop.
- Upload proof of delivery — attach a photo. For a document job, photograph the signed documents. If it is a swap (for example a pallet swap), photograph the goods you delivered — and before you leave, also take a photo of the goods you are collecting to bring back. There is no separate collection form for the return leg, so this photo is your record of what you loaded.
- Additional details — optional notes. The customer will see these, so keep them clear and factual.
- Wait & Return acknowledgement — tick to confirm you will return to the original collection point and securely transport back any items for swap or return.
Tap Update to submit.
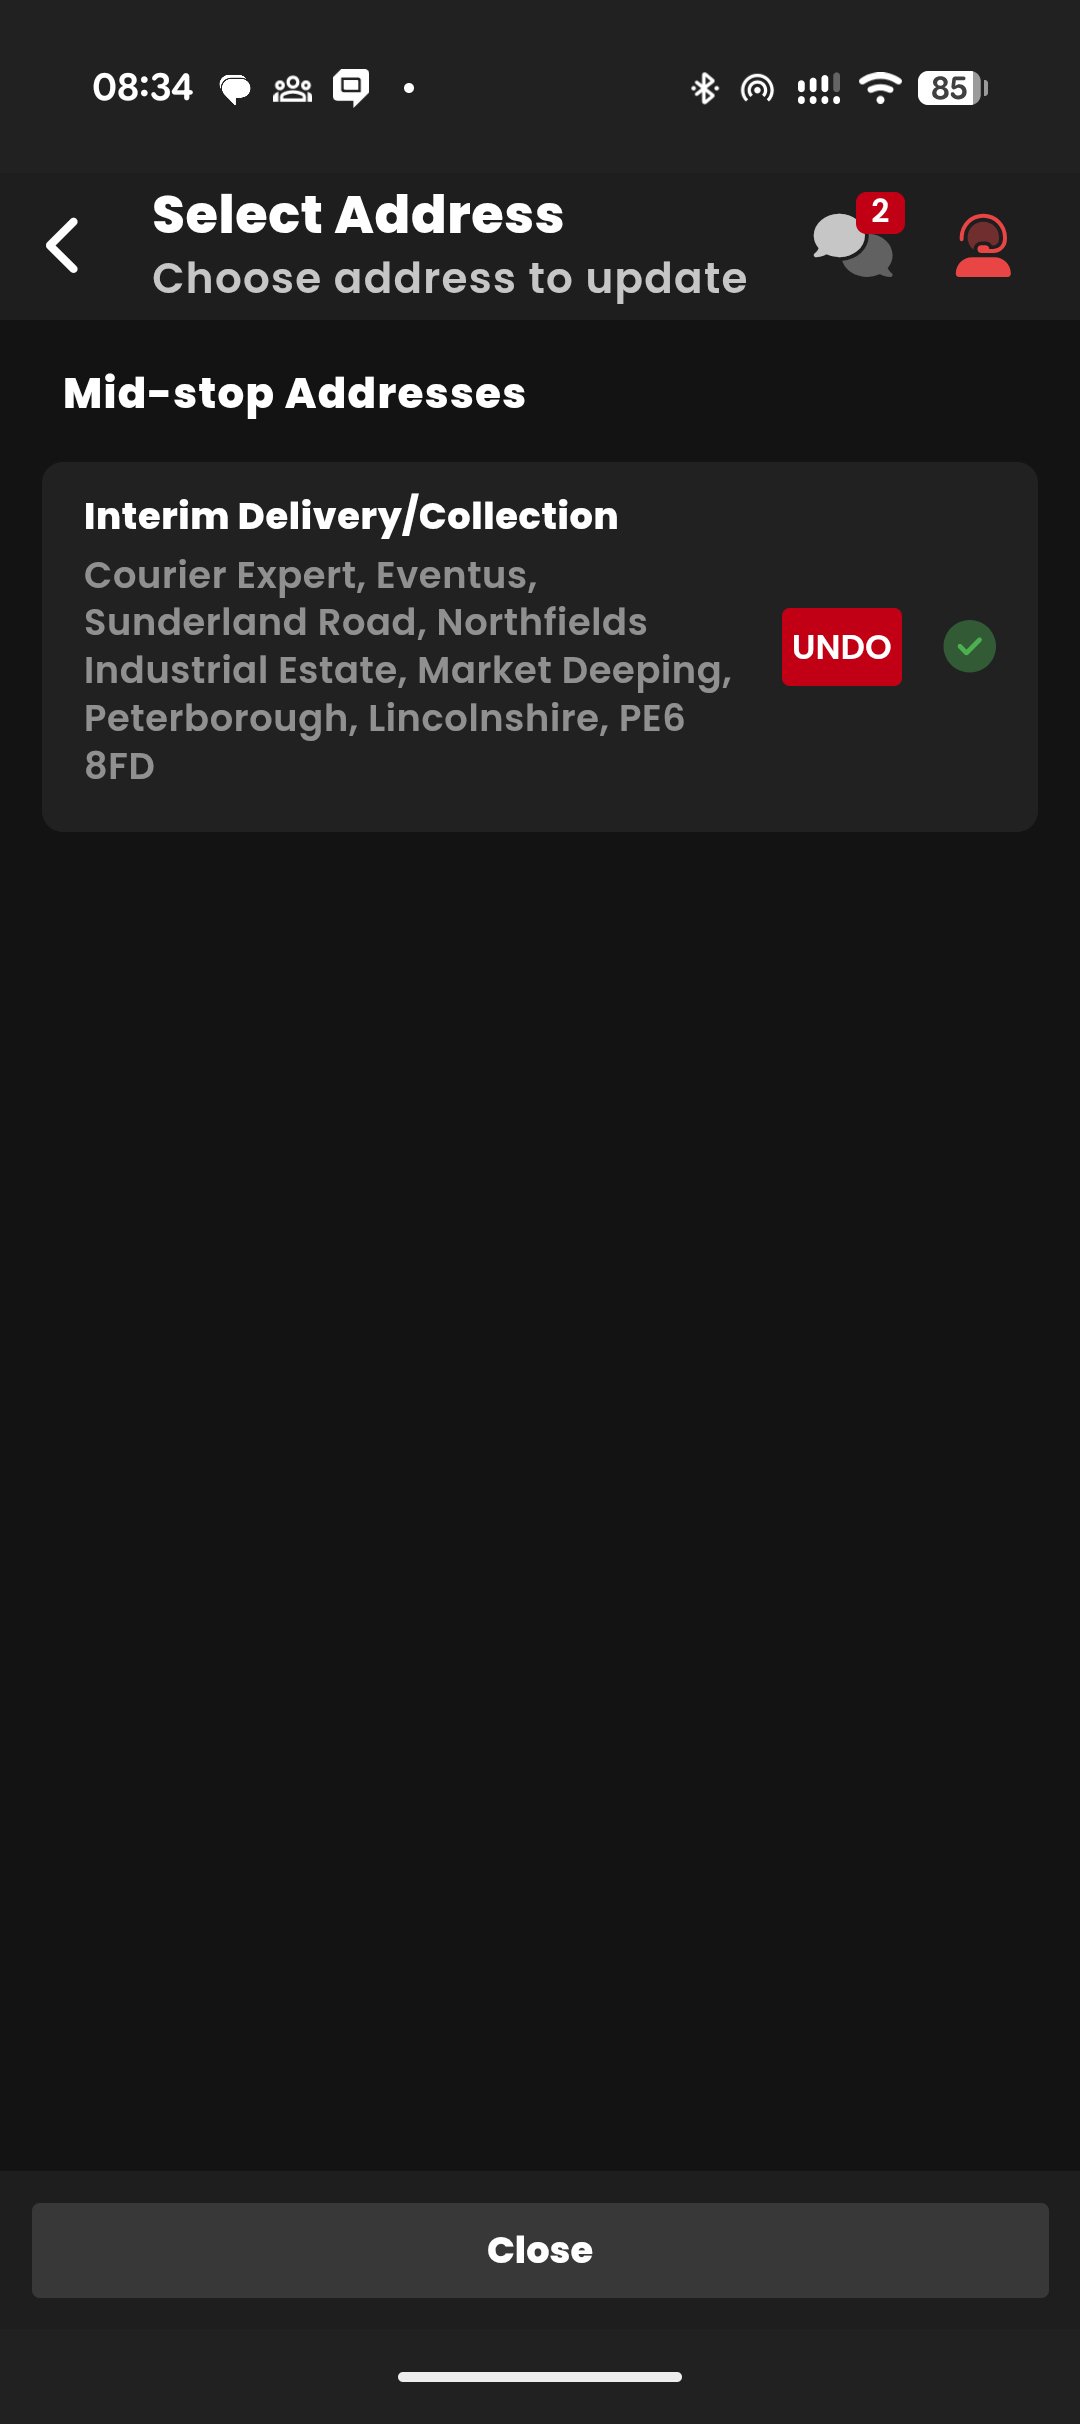
The address now shows as updated, with an UNDO button if you submitted by mistake.
Back on the Manage Job screen, the step now reads 1/1 updated.
4. Return and complete the job
Drive back to the original collection point. When you have offloaded, open the I have returned step. This works the same as marking a normal job as delivered.
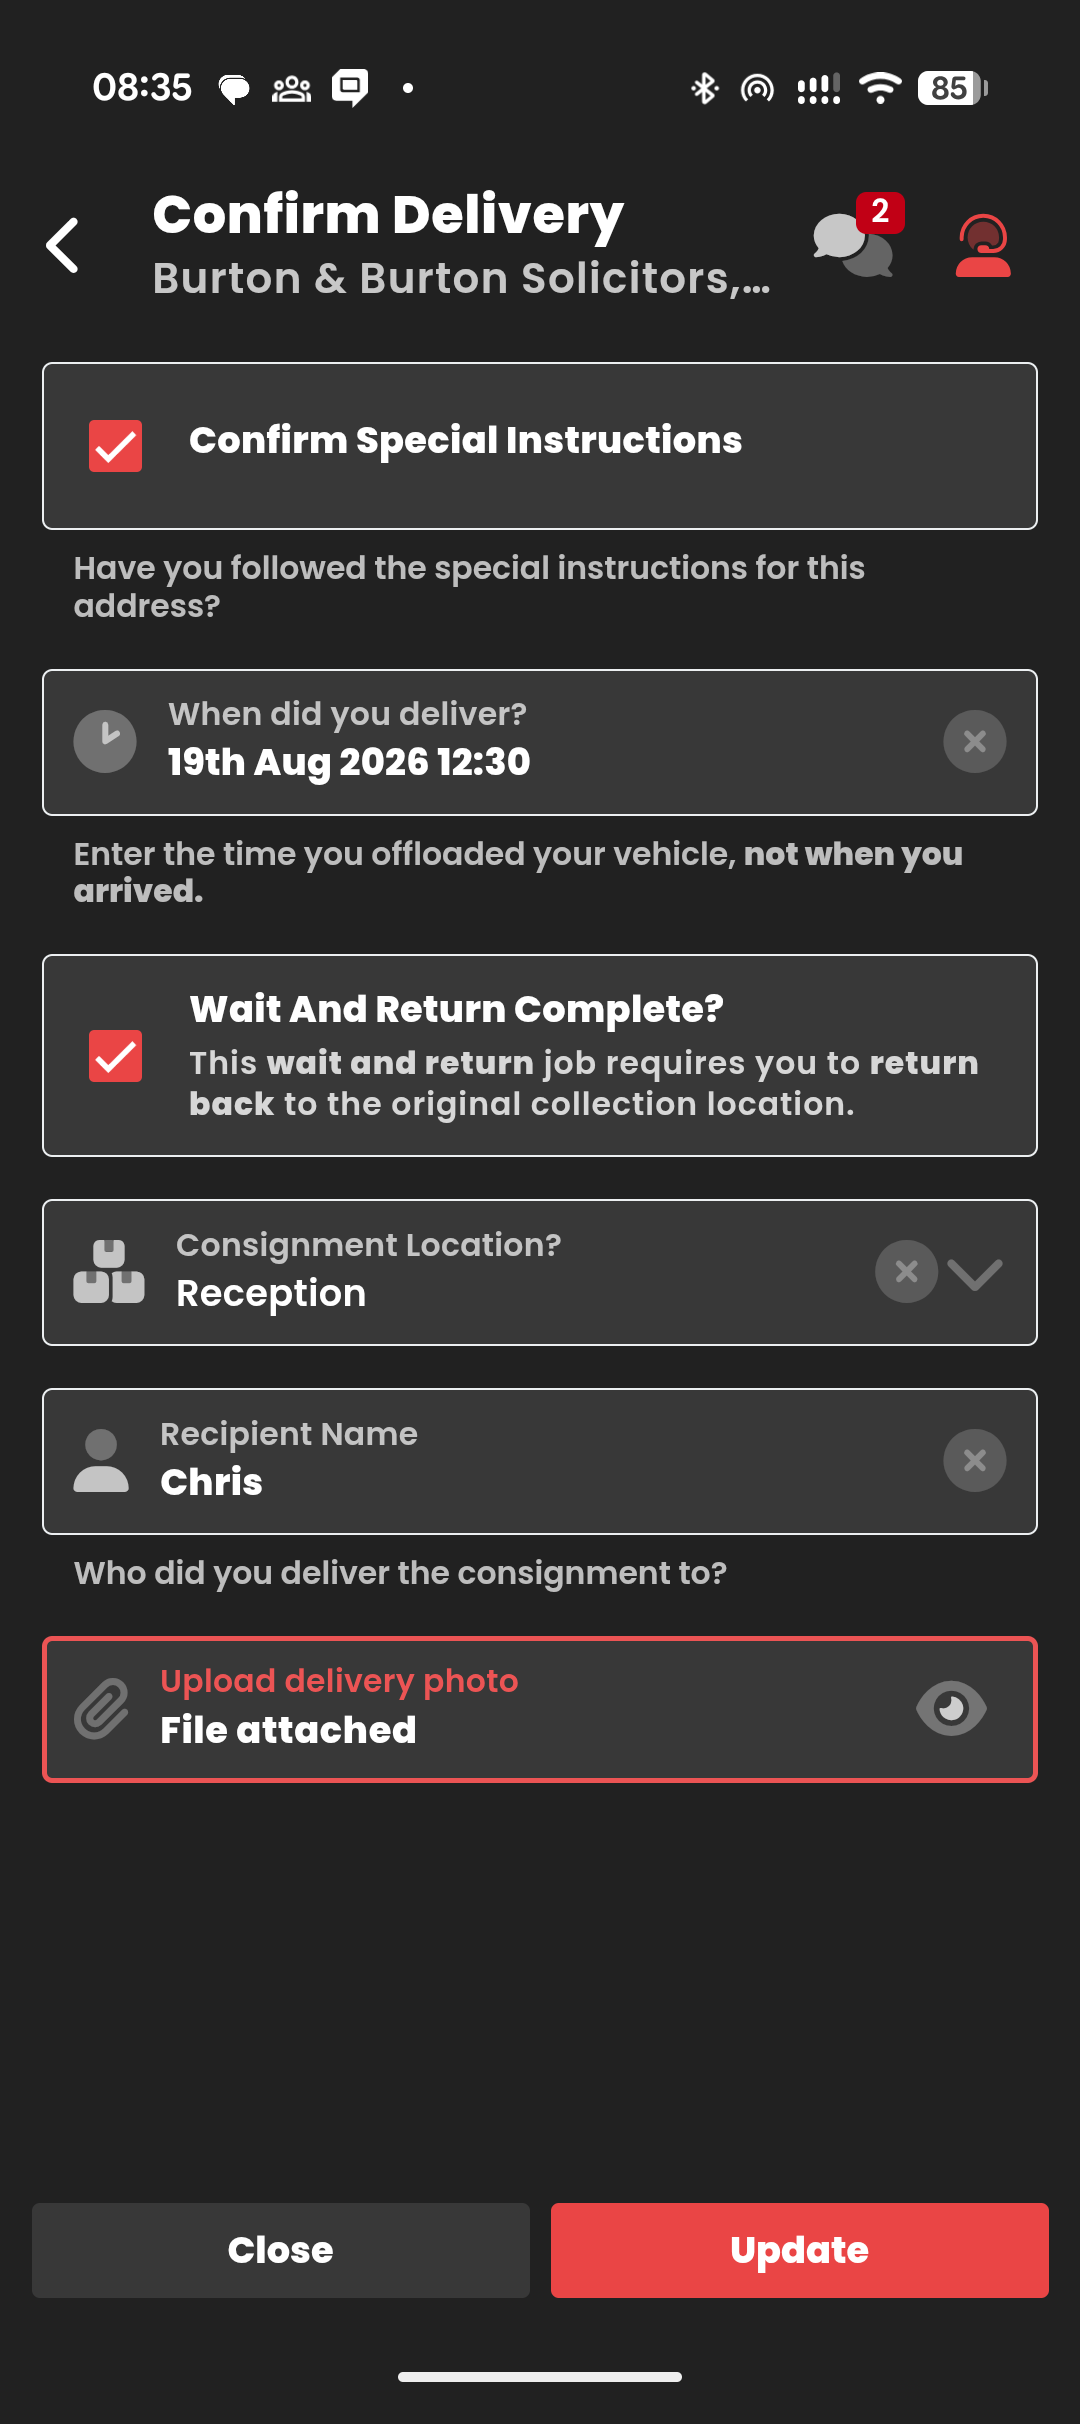
Complete the Confirm Delivery form:
- Confirm Special Instructions — tick to confirm you followed any instructions for the return.
- When did you deliver? — enter the time you offloaded your vehicle, not when you arrived.
- Wait And Return Complete? — tick to confirm you have returned to the original collection location.
- Consignment Location — where you left the consignment (for example, Reception).
- Recipient Name — who you handed the consignment to.
- Upload delivery photo — a photo of the goods at the return point.
Tap Update. The job is now complete.
Quick recap
| Step | Where | What to do |
|---|---|---|
| I have collected | A address | Record Goods On Board as normal |
| Update Interim Address | B address | Follow the special instructions, complete the Confirm Mid-stop form with time and photo |
| I have returned | Back at A | Complete the Confirm Delivery form with time, recipient, and photo |
Remember:
- Agree a return time with the customer at the collection point.
- If it is a swap, photograph both what you deliver and what you collect at the B address.
- Enter offload times, not arrival times.
